> ## Documentation Index
> Fetch the complete documentation index at: https://docs.pinata.cloud/llms.txt
> Use this file to discover all available pages before exploring further.
# Introduction
> Getting started with the Pinata API
Welcome to the Pinata API Reference! Before you can do anything in the API, you'll need some API Keys.
## API Keys
Visit the [Pinata API Keys](https://app.pinata.cloud/developers/api-keys) page to generate new keys.
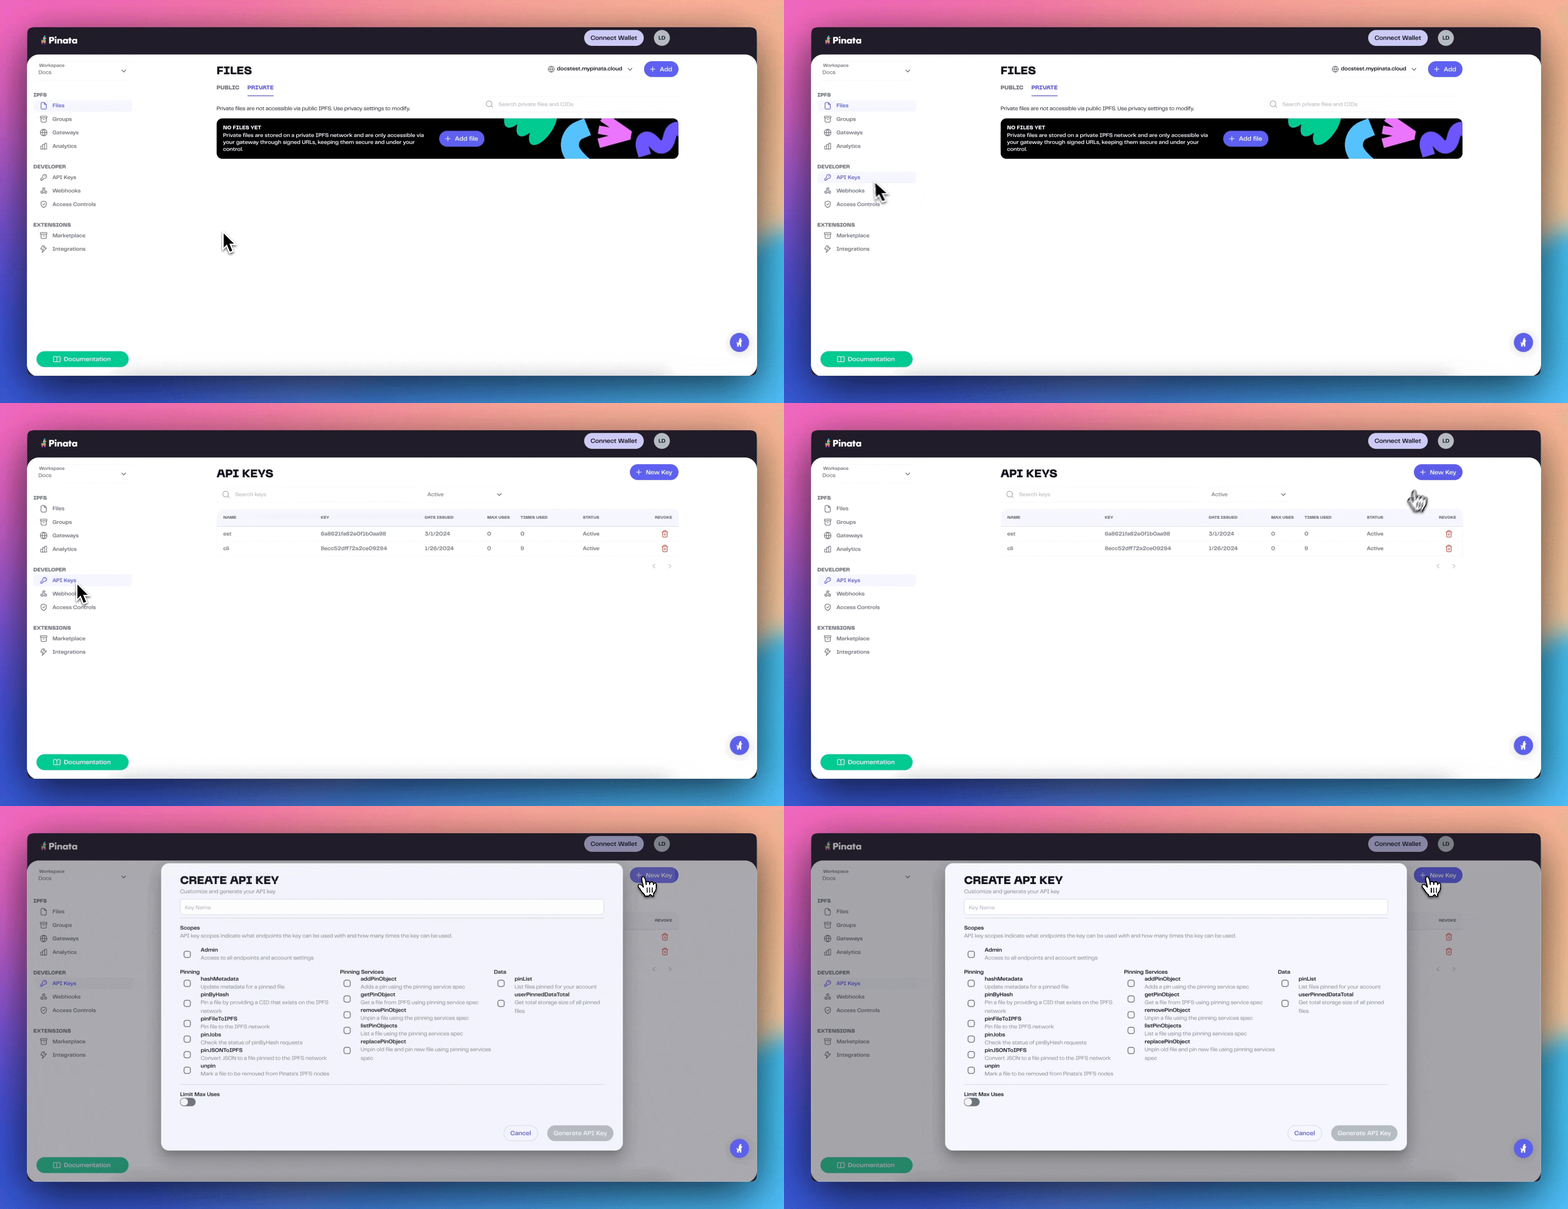 In the 'New Key' modal, you can choose if you want the key to be an Admin key and have full access over every endpoint, or scope the keys by selecting which endpoints you want to use. You can also give it a limited number of uses, so be sure to give it a name to keep track of it. Once you have that filled out, click "Generate API Key" and it will show you the `pinata_api_key`, `pinata_api_secret_key`, and the `JWT`. It's best to click "Copy All" and keep the API key data safe and secure.
Once API keys have been created, you will not be able to see the secret or JWT
again
Once you have created your keys you can go ahead and try testing them! Try to paste this into your terminal with your `JWT`
```bash theme={null}
curl --request GET \
--url https://api.pinata.cloud/data/testAuthentication \
--header 'accept: application/json' \
--header 'authorization: Bearer YOUR_PINATA_JWT'
```
If successful you should see this!
```shell bash theme={null}
{
"message": "Congratulations! You are communicating with the Pinata API!"
}
```
In the 'New Key' modal, you can choose if you want the key to be an Admin key and have full access over every endpoint, or scope the keys by selecting which endpoints you want to use. You can also give it a limited number of uses, so be sure to give it a name to keep track of it. Once you have that filled out, click "Generate API Key" and it will show you the `pinata_api_key`, `pinata_api_secret_key`, and the `JWT`. It's best to click "Copy All" and keep the API key data safe and secure.
Once API keys have been created, you will not be able to see the secret or JWT
again
Once you have created your keys you can go ahead and try testing them! Try to paste this into your terminal with your `JWT`
```bash theme={null}
curl --request GET \
--url https://api.pinata.cloud/data/testAuthentication \
--header 'accept: application/json' \
--header 'authorization: Bearer YOUR_PINATA_JWT'
```
If successful you should see this!
```shell bash theme={null}
{
"message": "Congratulations! You are communicating with the Pinata API!"
}
```