> ## Documentation Index
> Fetch the complete documentation index at: https://docs.pinata.cloud/llms.txt
> Use this file to discover all available pages before exploring further.
# Astro
> Get started using Pinata with Astro
This guide will walk you through setting up Pinata with Astro
## Create an API Key and get Gateway URL
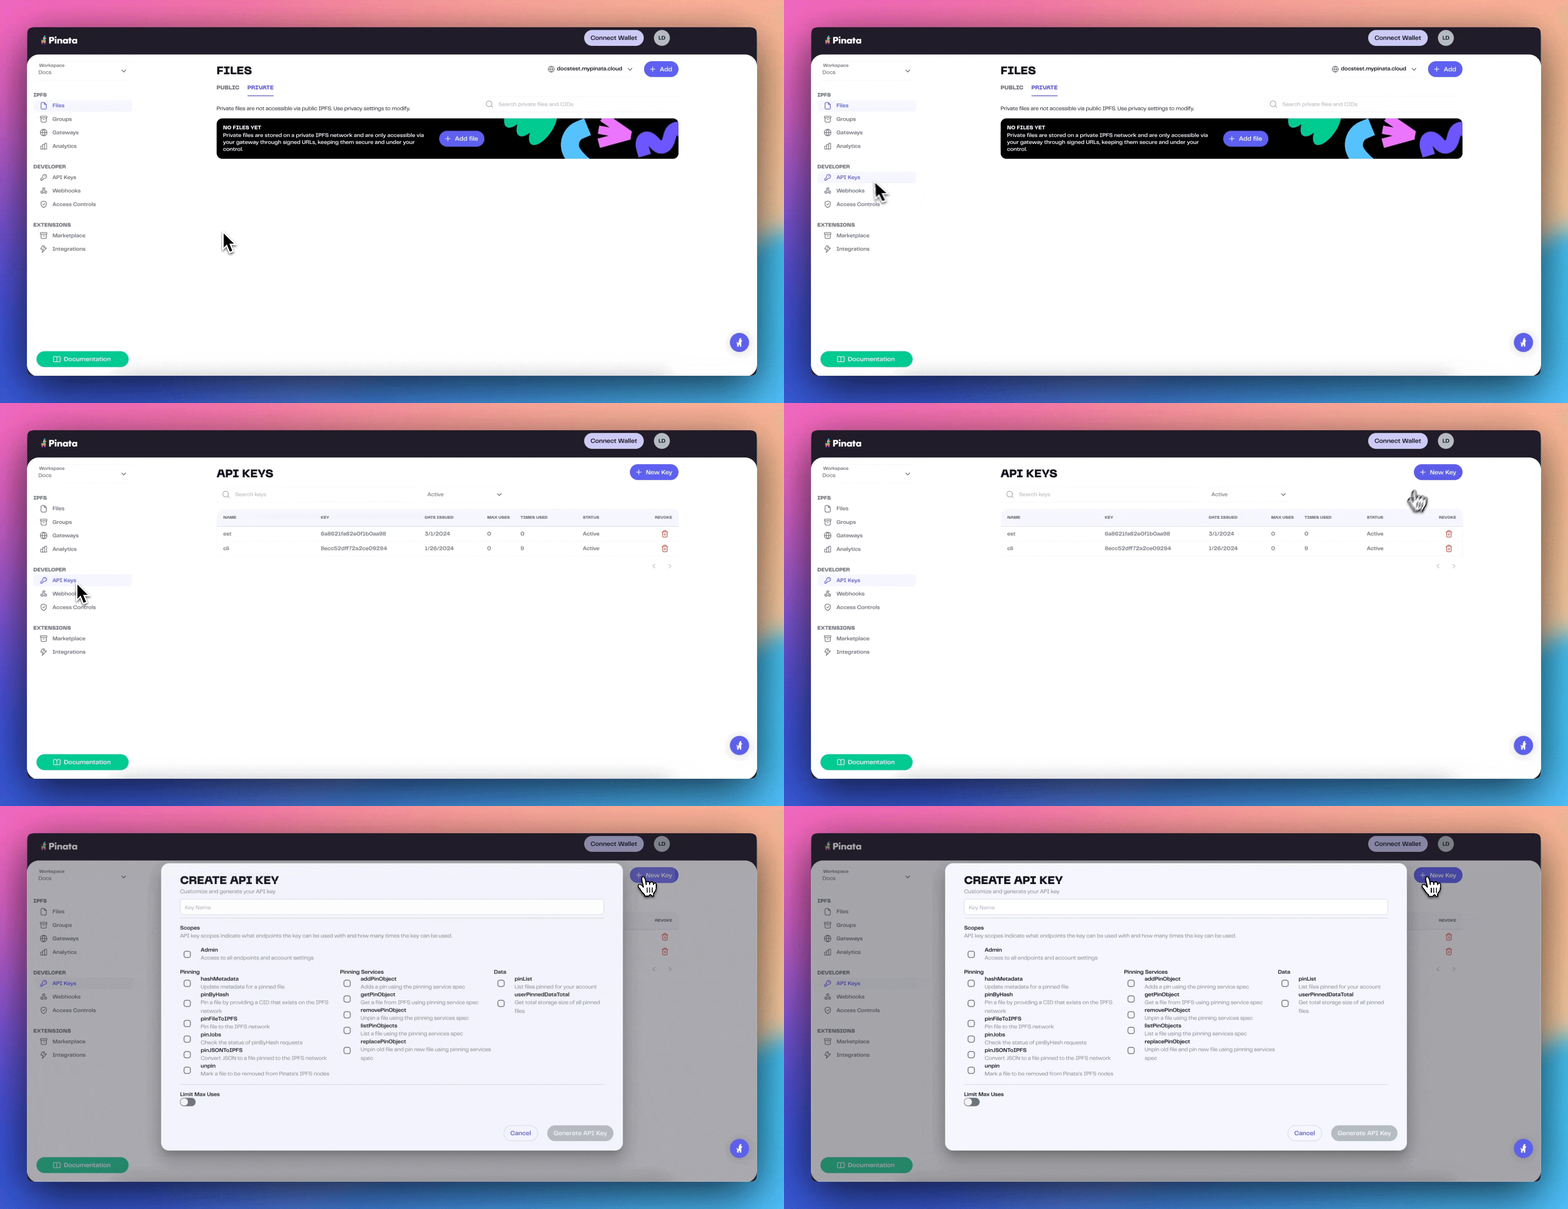
To create an API key, visit the [Keys Page](https://app.pinata.cloud/developers/keys) and click the "New Key" button in the top right. Once you do that you can select if you want your key to be admin or if you want to scope the privileges of the keys to certain endpoints or limit the number of uses. Make those selections, then give the key a name at the bottom, and click create key.
If you are just getting started we recommend using Admin privileges, then move
to scope keys as you better understand your needs
 Once you have created the keys you will be shown your API Key Info. This will contain your **Api Key**, **API Secret**, and your **JWT**. Click "Copy All" and save them somewhere safe!
The API keys are only shown once, be sure to copy them somewhere safe!
After you have your API key, you will want to get your Gateway domain. When you create a Pinata account, you'll automatically have a Gateway created for you! To see it, simply visit the [Gateways Page](https://app.pinata.cloud/gateway) see it listed there.
Once you have created the keys you will be shown your API Key Info. This will contain your **Api Key**, **API Secret**, and your **JWT**. Click "Copy All" and save them somewhere safe!
The API keys are only shown once, be sure to copy them somewhere safe!
After you have your API key, you will want to get your Gateway domain. When you create a Pinata account, you'll automatically have a Gateway created for you! To see it, simply visit the [Gateways Page](https://app.pinata.cloud/gateway) see it listed there.
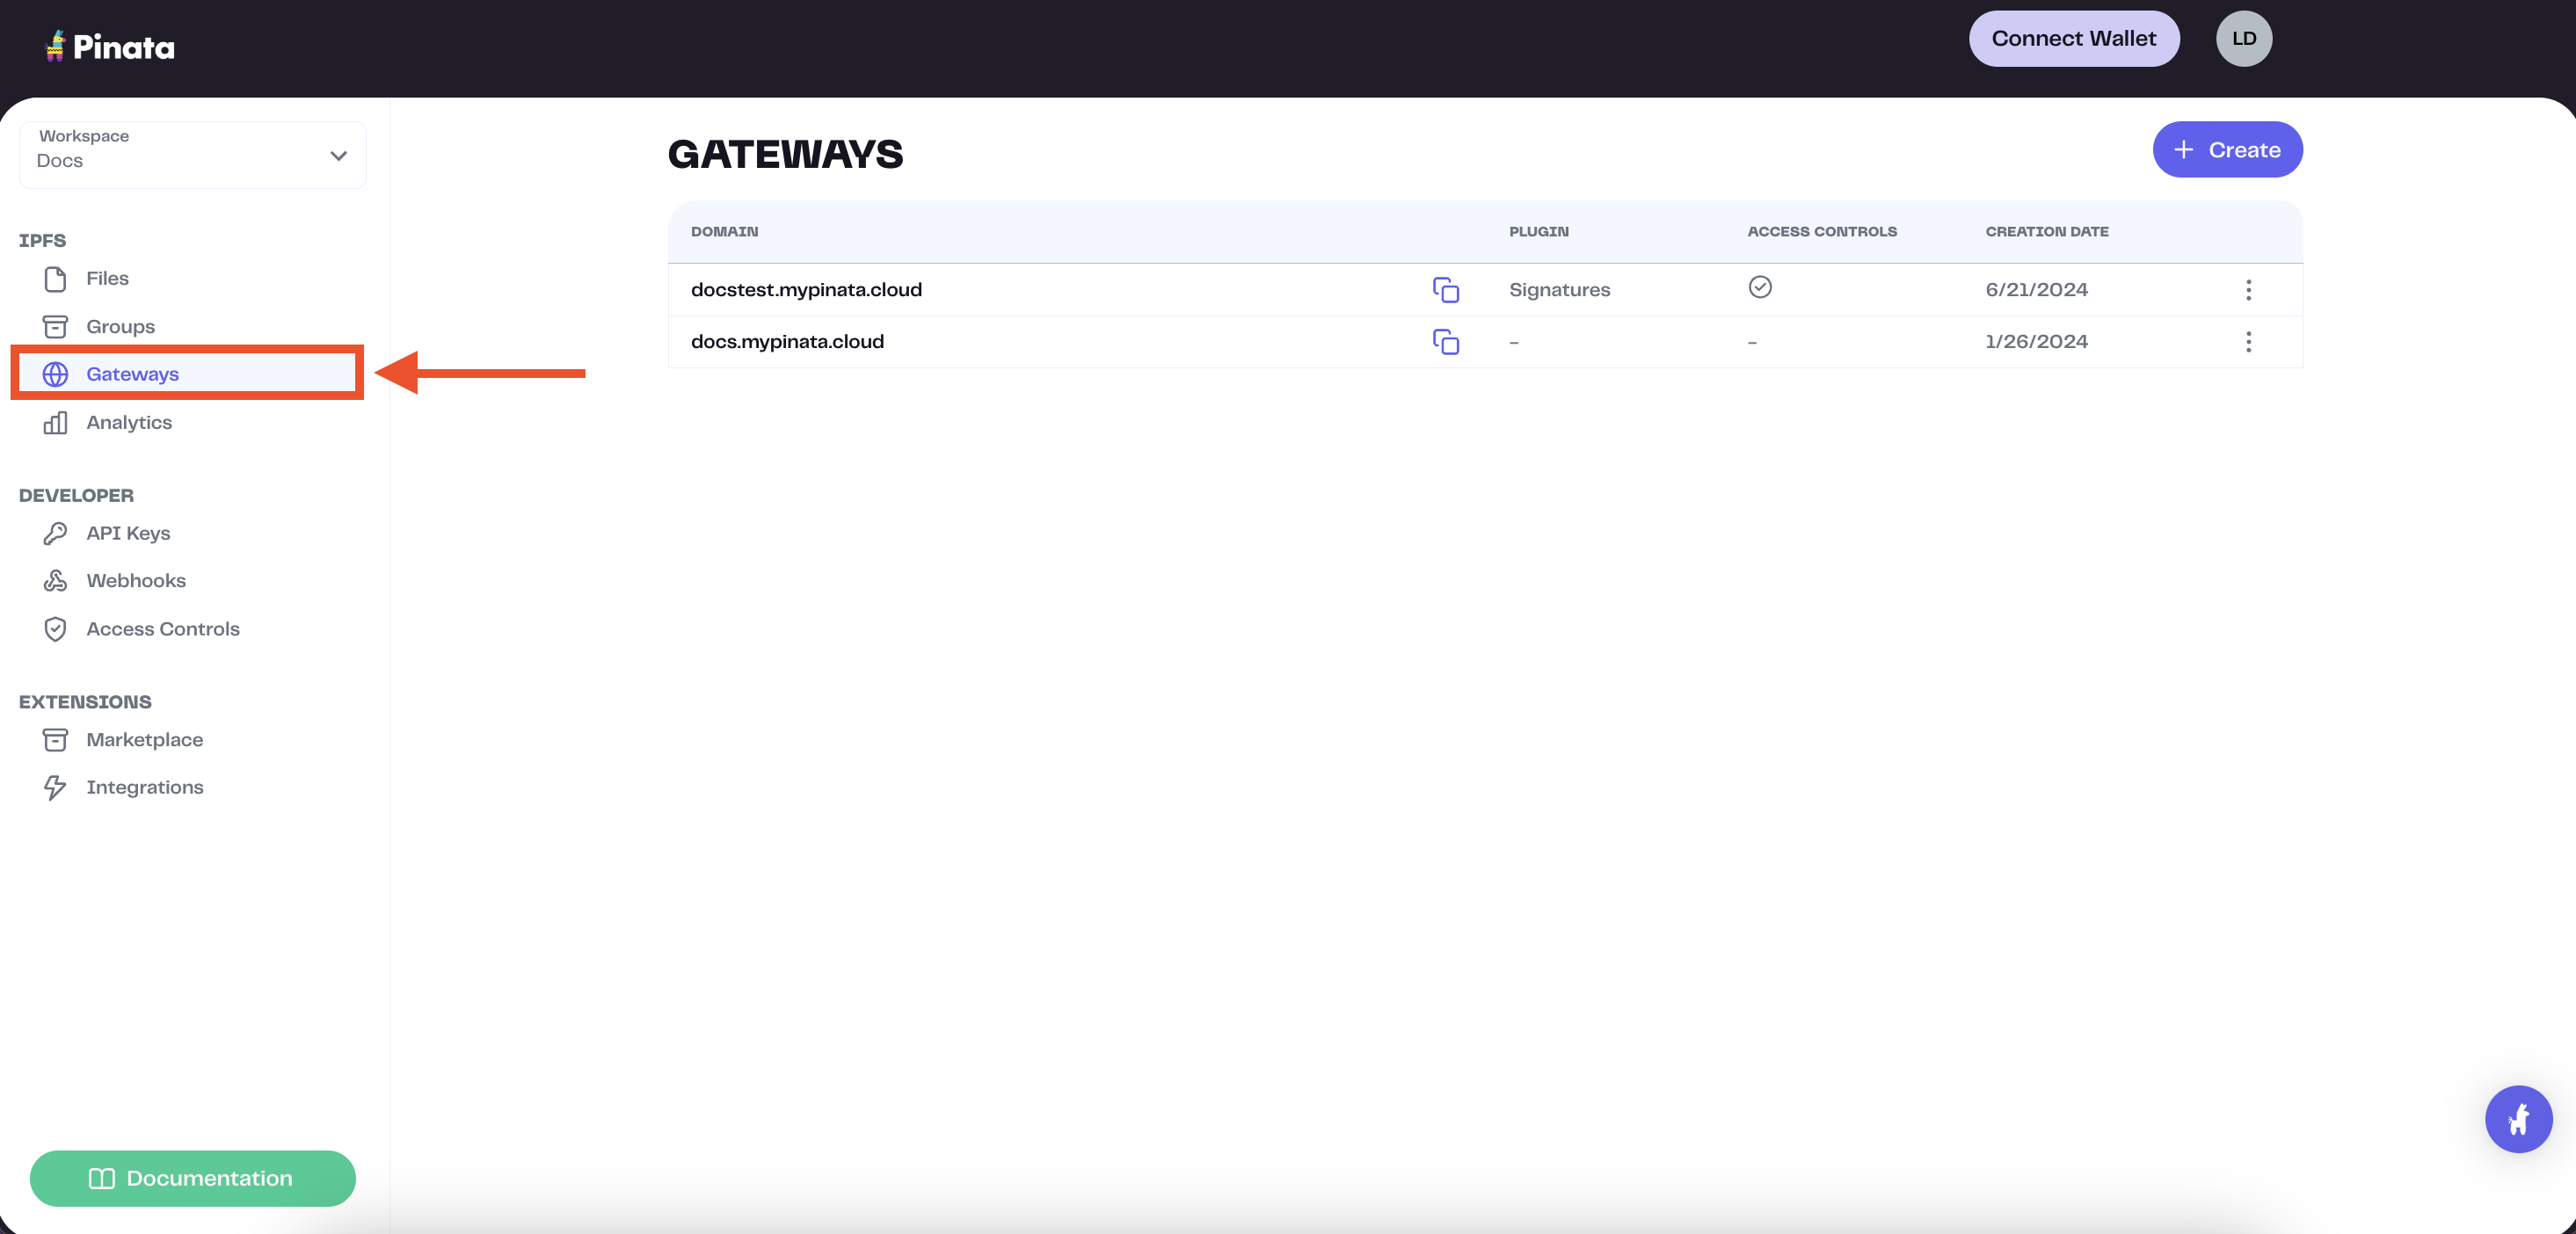 The gateway domains are randomly generated and might look something like this:
```
aquamarine-casual-tarantula-177.mypinata.cloud
```
## Setup Astro
To create a new Astro project go ahead and run this command in the terminal:
```bash theme={null}
npm create astro@latest pinata-astro
```
You can select which options you prefer, but for this exmaple we'll use the following:
```
tmpl How would you like to start your new project?
Empty
ts Do you plan to write TypeScript?
Yes
use How strict should TypeScript be?
Strict
deps Install dependencies?
Yes
git Initialize a new git repository?
Yes
```
After completing the project setup we can go ahead and `cd` into the repo and install `pinata`.
```bash theme={null}
cd pinata-astro && npm i pinata
```
Since we want to keep our API key private we will need to make sure our code is deployed server side, and we can use several different adapter options which you can view [here](https://docs.astro.build/en/guides/server-side-rendering/). We also need a UI framework to handle our upload form, and there are many to choose from [here](https://docs.astro.build/en/guides/framework-components/). We'll use `vercel` and `svelte` for this tutorial, and you can install them like so.
```bash theme={null}
npx astro add vercel svelte
```
This should install the dependencies and alter the `astro.config.mjs` for us.
## Setup Pinata
In the `src` folder make a new folder called `utils`, and inside there make a file called `pinata.ts` with the following contents:
```typescript src/utils/pinata.ts theme={null}
import { PinataSDK } from "pinata";
export const pinata = new PinataSDK({
pinataJwt: import.meta.env.PINATA_JWT,
pinataGateway: import.meta.env.GATEWAY_URL,
});
```
This will create and export an instance of the Files SDK using environment variables, and to set those up make a new file at the root of the project called `.env` with the following values:
```
PINATA_JWT= # The Pinata JWT API key we got earlier
GATEWAY_URL= # The Gateway domain we grabbed earlier, formatting just as we copied it from the app
```
## Create Client Side Form
In the `src` folder make another folder called `components`, then inside there make file called `UploadForm.svelte`.
```html src/components/UploadForm.svelte theme={null}
```
This component creates a `
The gateway domains are randomly generated and might look something like this:
```
aquamarine-casual-tarantula-177.mypinata.cloud
```
## Setup Astro
To create a new Astro project go ahead and run this command in the terminal:
```bash theme={null}
npm create astro@latest pinata-astro
```
You can select which options you prefer, but for this exmaple we'll use the following:
```
tmpl How would you like to start your new project?
Empty
ts Do you plan to write TypeScript?
Yes
use How strict should TypeScript be?
Strict
deps Install dependencies?
Yes
git Initialize a new git repository?
Yes
```
After completing the project setup we can go ahead and `cd` into the repo and install `pinata`.
```bash theme={null}
cd pinata-astro && npm i pinata
```
Since we want to keep our API key private we will need to make sure our code is deployed server side, and we can use several different adapter options which you can view [here](https://docs.astro.build/en/guides/server-side-rendering/). We also need a UI framework to handle our upload form, and there are many to choose from [here](https://docs.astro.build/en/guides/framework-components/). We'll use `vercel` and `svelte` for this tutorial, and you can install them like so.
```bash theme={null}
npx astro add vercel svelte
```
This should install the dependencies and alter the `astro.config.mjs` for us.
## Setup Pinata
In the `src` folder make a new folder called `utils`, and inside there make a file called `pinata.ts` with the following contents:
```typescript src/utils/pinata.ts theme={null}
import { PinataSDK } from "pinata";
export const pinata = new PinataSDK({
pinataJwt: import.meta.env.PINATA_JWT,
pinataGateway: import.meta.env.GATEWAY_URL,
});
```
This will create and export an instance of the Files SDK using environment variables, and to set those up make a new file at the root of the project called `.env` with the following values:
```
PINATA_JWT= # The Pinata JWT API key we got earlier
GATEWAY_URL= # The Gateway domain we grabbed earlier, formatting just as we copied it from the app
```
## Create Client Side Form
In the `src` folder make another folder called `components`, then inside there make file called `UploadForm.svelte`.
```html src/components/UploadForm.svelte theme={null}
```
This component creates a `