This guide will walk you through setting up Pinata in a SvelteKit app.
Create an API Key and get Gateway URL
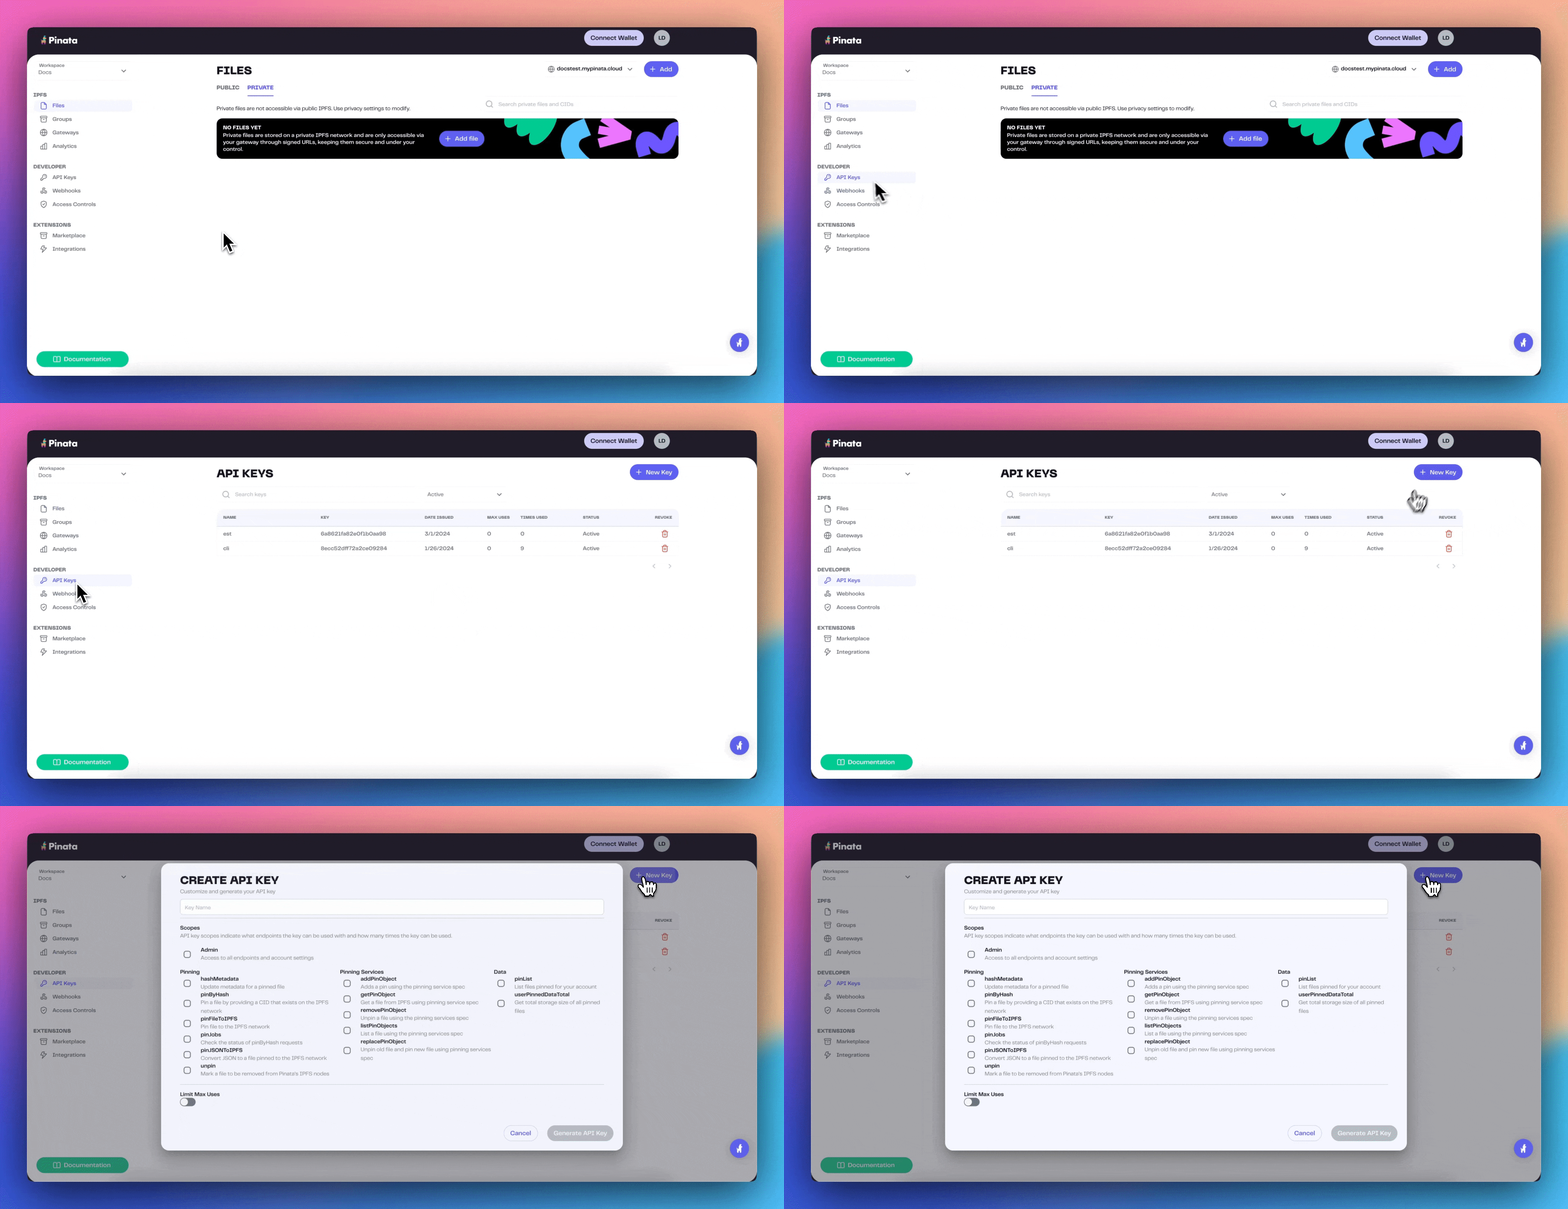
To create an API key, visit the Keys Page and click the “New Key” button in the top right. Once you do that you can select if you want your key to be admin or if you want to scope the privileges of the keys to certain endpoints or limit the number of uses. Make those selections, then give the key a name at the bottom, and click create key.
If you are just getting started we recommend using Admin privileges, then move
to scope keys as you better understand your needs
 Once you have created the keys you will be shown your API Key Info. This will contain your Api Key, API Secret, and your JWT. Click “Copy All” and save them somewhere safe!
The API keys are only shown once, be sure to copy them somewhere safe!
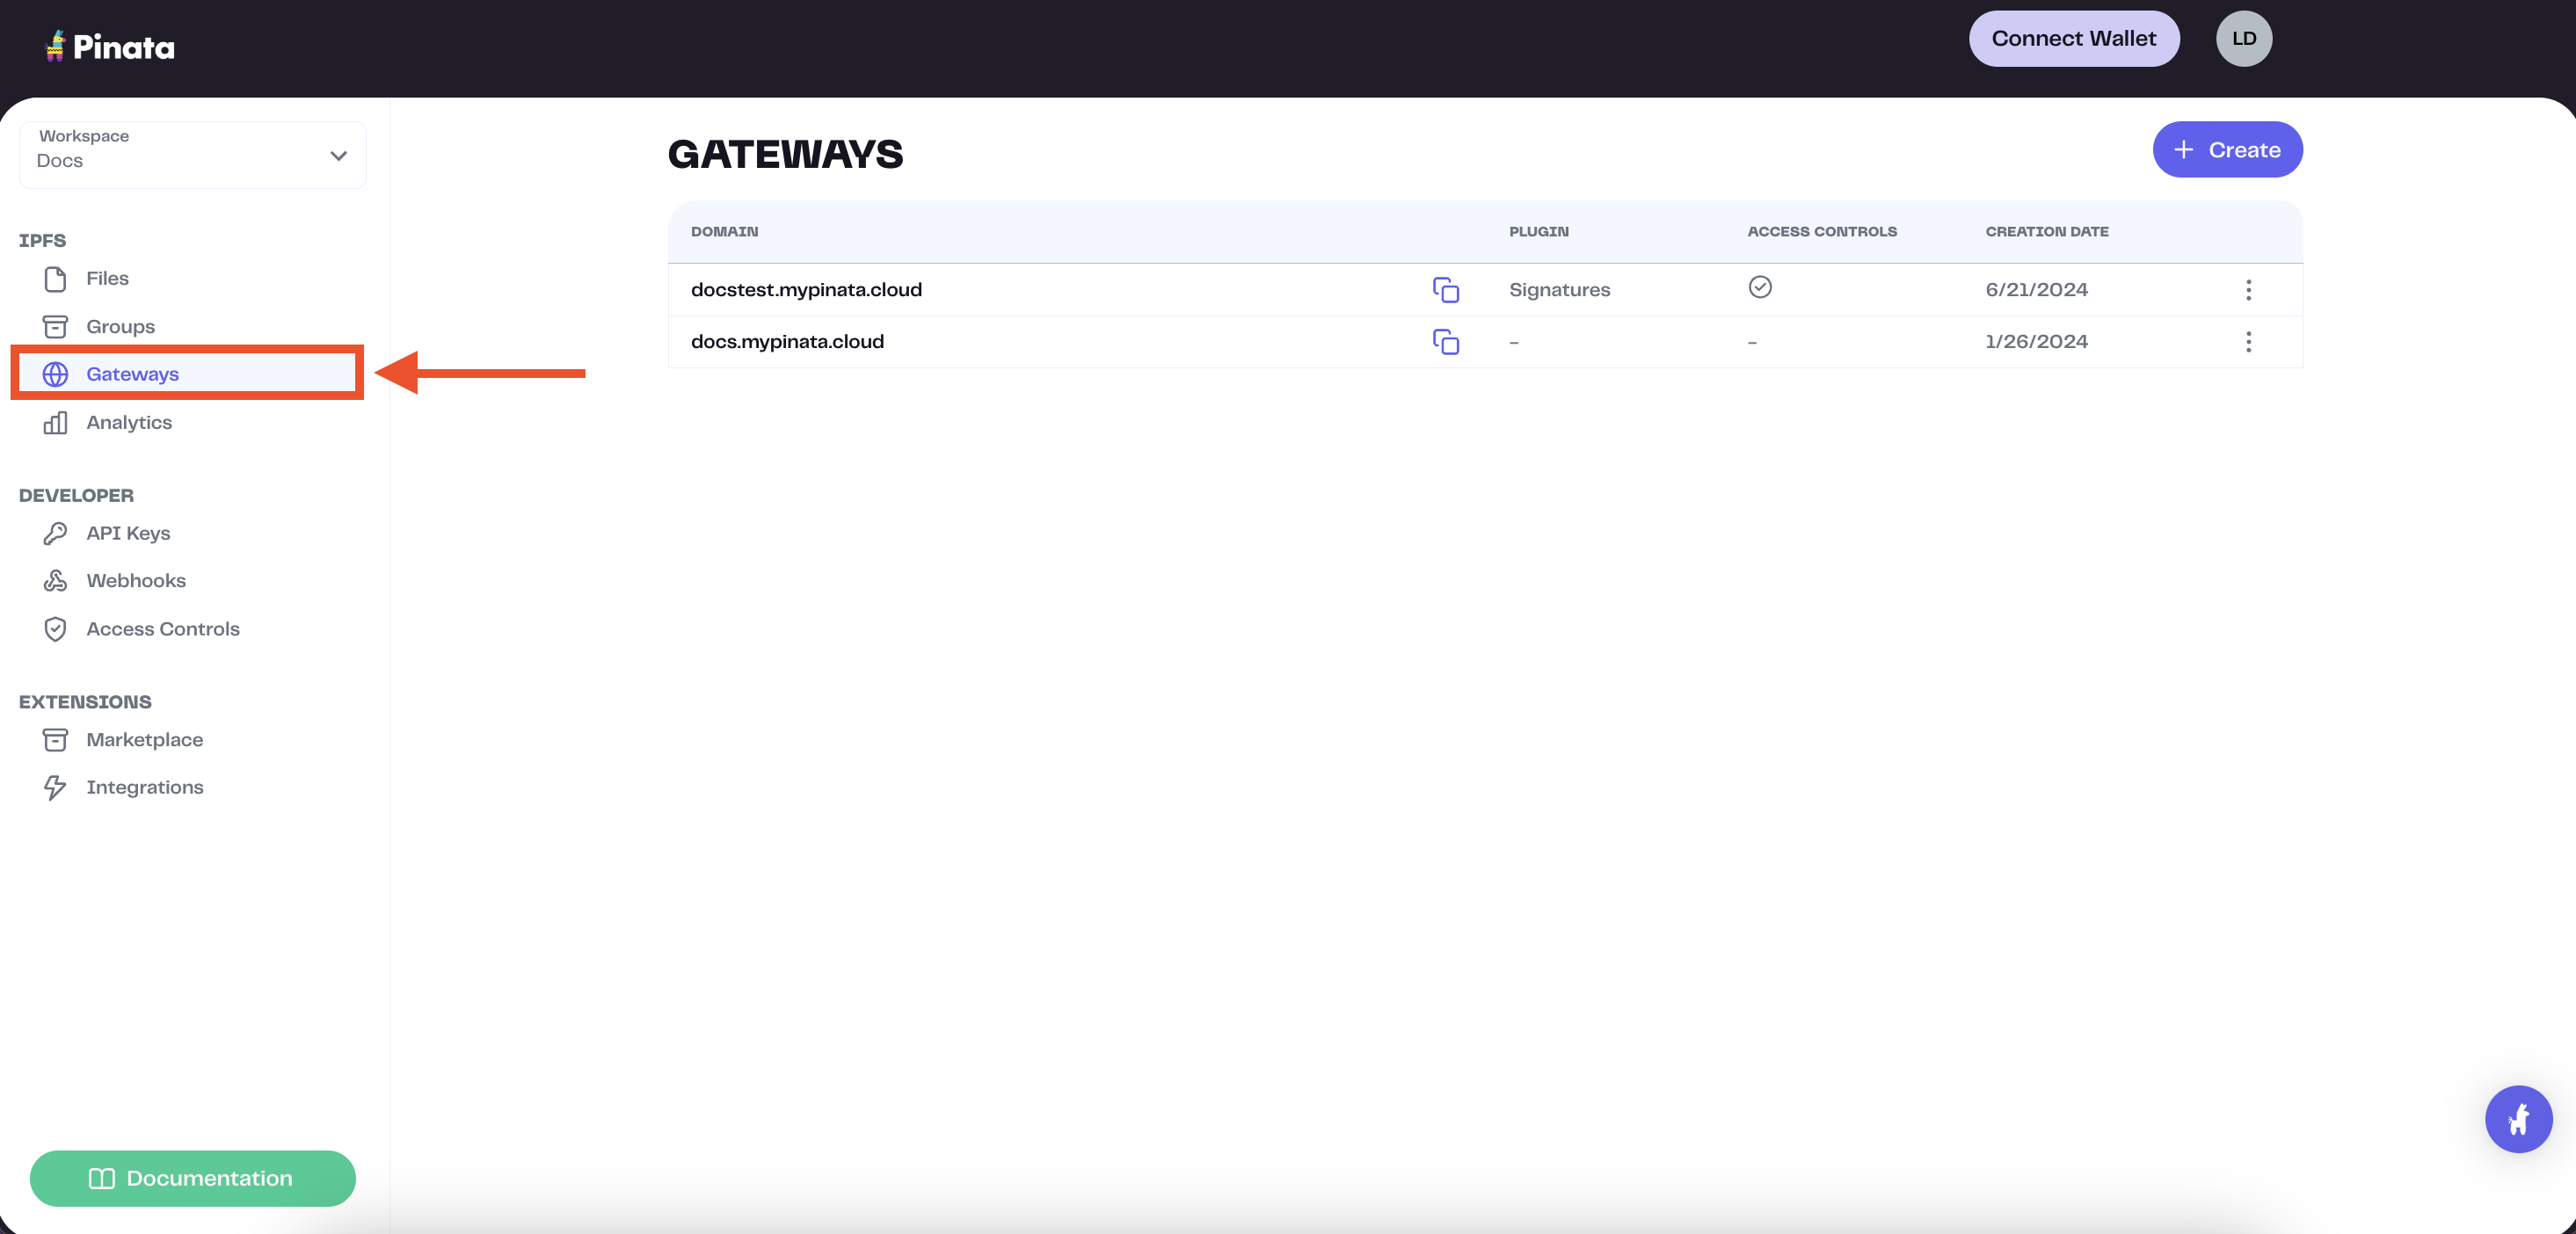
 The gateway domains are randomly generated and might look something like this:
aquamarine-casual-tarantula-177.mypinata.cloud
Server-side Setup
This guide will walk you through a server side upload flow in SvelteKit
Start up SvelteKit Project
The easiest way to start building a SvelteKit app is to run npm create
npm create svelte@latest pinata-app
- Which Svelte app template? Skeleton project
- Add type checking with TypeScript? Yes, using TypeScript syntax
- Select additional options (use arrow keys/space bar) <- These are optional
cd into the repo and install pinata
In this demo we will be using tailwindcss with typography plugin. Follow other CSS Framework guides respectively.
npx svelte-add@latest tailwindcss
.env.local file in the root of the project and put in the following variables:
PINATA_JWT=
PUBLIC_GATEWAY_URL=
JWT from the API key creation in the previous step as well as the Gateway Domain. The format of the Gateway domain should be mydomain.mypinata.cloud.
Setup Pinata
Create a directory called server in the src/lib folder of the project and then make a file called pinata.ts inside of it. In that file we’ll export an instance of the Files SDK that we can use throughout the rest of the app.
The use of the server directory prevents it being used client side.
import { PinataSDK } from "pinata"
import { PINATA_JWT } from "$env/static/private";
import { PUBLIC_GATEWAY_URL } from "$env/static/public";

export const pinata = new PinataSDK({
  pinataJwt: `${PINATA_JWT}`,
  pinataGateway: `${PUBLIC_GATEWAY_URL}`
})
src/routes/+page.svelte file take out the boiler plate code and use the following.
Lets also restrict the allowed extensions for the file. (e.g. jpg, jpeg, png, webp).
<script lang="ts">
  import { enhance } from '$app/forms';

  let uploading = false;

  function handleUpload() {
    uploading = true;
      return async ({ update }) => {
        await update();
        uploading = false;
      };
  }
</script>

<main class="w-full min-h-screen m-auto flex flex-col justify-center items-center">
  <form method="POST" enctype="multipart/form-data" use:enhance={handleUpload}>
    <input type="file" id="file" name="fileToUpload" accept=".jpg, .jpeg, .png, .webp" />
    <button disabled={uploading} type="submit">
      {uploading ? 'Uploading...' : 'Upload'}
    </button>
  </form>
</main>
Create Server Action
Create a server file, src/routes/+page.server.ts, so that we can add a form action to use.
Since this demo and page only has 1 form, we will keep the default action.
src/routes/+page.server.ts
import { fail, json, type Actions } from "@sveltejs/kit";
import { pinata } from "$lib/server/pinata";

export const actions: Actions = {
  default: async ({ request }) => {
    try {
      const formData = await request.formData();
      const uploadedFile = (formData?.get('fileToUpload') as File);

      if (!uploadedFile.name || uploadedFile.size === 0) {
        return fail(400, {
          error: true,
          message: "You must provide a file to upload"
        })
      }

      const upload = await pinata.upload.public.file(uploadedFile);
      const url = await pinata.gateways.public.convert(upload.cid);
      return { url, filename: uploadedFile.name, status: 200 };
    } catch (error) {
      console.log(error);
      return json(
        { error: "Internal Server Error" },
        { status: 500 }
      );
    }
  }
}
form prop on our +page.svelte. Now, after submitting the form,
the form prop will be updated and we can conditionally render the image we just uploaded.
<script lang="ts">
  import { enhance } from '$app/forms';
  import type { ActionData } from './$types';

  export let form: ActionData;
  let uploading = false;

  function handleUpload() {
    uploading = true;
      return async ({ update }) => {
        await update();
        uploading = false;
      };
  }
</script>

<main class="w-full min-h-screen m-auto flex flex-col justify-center items-center">
  <form method="POST" enctype="multipart/form-data" use:enhance={handleUpload}>
    <input type="file" id="file" name="fileToUpload" accept=".jpg, .jpeg, .png, .webp" />
    <button disabled={uploading} type="submit">
      {uploading ? 'Uploading...' : 'Upload'}
    </button>
  </form>
  {#if form && form.status === 200}
    <img src={form.url} alt={form.filename} />
  {/if}
</main>